Thursday, June 30, 2011

. . . Patriotic Crunch . . .

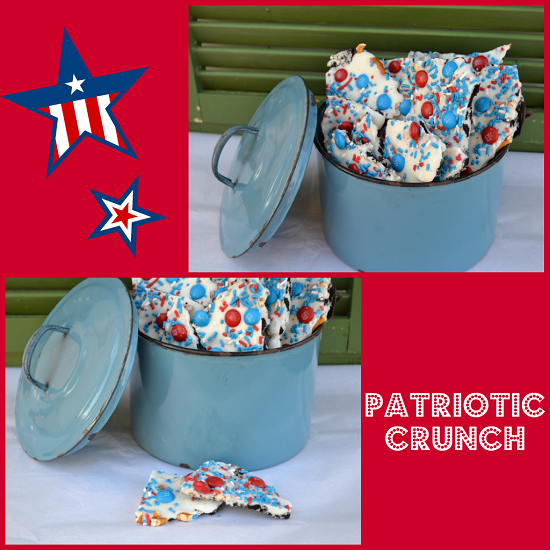
To keep with the theme of Red, White and Blue I wanted to make something super easy but festive so I came up with this quick and simple recipe based on Bark that I make for the Christmas Holiday Season.  I needed a fun name for it so I came up with Patriotic Crunch and it seemed appropriate with Independence Day around the corner.  This is so super duper easy but everyone will love it!  I made it today and by the end of the day I think my family, I mean me, had eaten about half of it.  Watch out...it is addictive!


Gather your ingredients--you really could add anything to this that you want.
Melt your Almond Bark over very low heat or in the microwave.  Be careful because once it burns it is ruined.

**TIP**
When making Bark dab a little of your melted chocolate on each corner of your cookie sheet, then lay your parchment paper down and press over the melted chocolate.  It is like a glue and it holds the parchment in place.

Crumble your pretzels and Oreos over the parchment lined baking sheet
Drizzle the melted chocolate over the top of the pretzels and Oreos.  Spread chocolate with a spatula but don't drag the oreos too much or your chocolate will get yucky looking.

Once the chocolate is smoothed over your pretzels and Oreos, sprinkle with red, white and blue sprinkles.
Add red and blue M&Ms over the top. 
Place in the fridge until chocolate is completely cooled. 

Make sure the Bark is completely solid before you start breaking it up.  I let mine sit for at least an hour in the fridge.
Just start breaking pieces off of the Bark until you get the desired size.  Enjoy!


Wednesday, June 29, 2011

. . . DIY Bandana Flip Flops . . .

With the 4th of July coming up there are lots of cook outs and parties planned so you need something festive to wear, right?  Well, how much cuter can you get than cute Bandana Flip Flops?  This is an inexpensive way to make a plain pair of flip flops really cute!

I purchased a pair of navy blue flip flops from Wal Mart for $1.98 and 3 Bandanas in red, light blut and a navy and red combo.  I cut the hem off of all four edges of the bandana and then cut into the bandana by a little bit and then ripped the fabric into strips.  It's basically just like I did this Rag Wreath.  Then you just start tying knots around the flipflops.  You may want to cut your strips into smaller pieces so they go farther.  I used strips that I cut about 5 inches long.  I had to trim a few of the ends because some were too long once they were tied on the flip flop.

*These will look alot better this weekend when my toes have red polish on them. 
Somehow the hot pink just isn't cutting it.

Tear your bandanas into strips about 5 inches long
Tie them around your flip flop straps.  Keep the fabric tight together for a more fluffy appearance
Continue tying your fabric onto the flip flops until the entire strap is covered or just do a big pom pom at the front of the flop.

You will want to cut any excess strings off the fabric pieces but leave some to add character to the cute shoes you just made.

Linking Here:

Tuesday, June 28, 2011

. . . Cookie Time Tuesday- Butter Sandwich Cookies . . .

I wanted to stick within the theme of Red, White and Blue Week so I had to share a cookie that is perfect for this occasion.  The nice thing about this recipe from Urban Baker is that you can make it any color you want!  Think how pretty these would be for a baby shower, luncheon, tea party, bridal shower etc.  You could do them in so many beautiful colors. 

I would recommend using the gel food coloring to get a richer color.  I am cooking at my grandmother's this week and I realized that I didn't have the gel coloring with me and I didn't want to make a store run when I was all set to make the cookies.  After adding the red and blue sugar on top they were bright enough but it would have been even better to have the gel coloring.


*Check out that beautiful enamelware my grandmother
has that I got to use for the photos. 
Going to have to start purchasing some pieces when I see them.

Print recipe HERE

You will need:
1 lb. unsalted butter, softened
2 cups powdered sugar
1/2 tsp. salt
splash of vanilla
5 cups all-purpose flour
 Filling
1 stick unsalted butter, softened
1 3/4 cups powdered sugar
dash of vanilla
1-2 Tbls. milk
*You can use a can of frosting if you don't have time to
make your own or just want to simplify the process
• Gather the ingredients
• Cream the butter until fluffy
• Add in the vanilla
• Add the powdered sugar and salt and mix well

• Divide the dough in half if you are making colored cookies
• Add your food coloring to each batch and mix well
• Add flour slowly and mix until well combined. 
You will need to add some more food coloring after you incorporate the flour

• Lay out a sheet of saran wrap and flour it. Then put your dough on it and form a disc.
Put in fridge for 15 minutes
• Roll dough out onto a floured surface to about 1/8 inch thickness
• Cut the cookies out using the cutter of your choice

• Bake cookies on a parchment lined baking sheet
• Remove from oven and let cool on baking sheet
• Remove to a cooling rack and let cool completely
• Get ready to frost your cookies to make a sandwich

• Frost the bottom side of one cookie
• Form a sandwich
• I brushed the top with just a little tiny bit of water and sprinkled
colored sugar on top to add a little something extra


Linking here:


Monday, June 27, 2011

. . . 4th of July Free Party Printables . . .

I love Freebies of any kind but there are so many awesome ones out there in blogland for your July 4th Parties!  These are a small sampling of the amazing assortment floating around out there.


Patriotic Print @ Madigan Made

Pinwheels @ Love the Day
Patriotic Sign @ Eighteen25
America the Beautiful Sign @ Anything But Perfect
4th of July Party Freebies @ Tweedle Dee Designs

Fill In Party Invitations @ Bnute Productions
They're Coming to America Sign @ Less Cake More Frosting
Party Download @ Lauren McKinsey
4th of July Party Fans @ Guildcraft

Do you have a great Free Download you want to share?  Just leave a link in the comments!
 

Sunday, June 26, 2011

. . . 4th of July Party by A to Zebra Celebrations . . .

I love almost everything about parties--the invitations, the decorations, the food, the friends and family that get together to celebrate but the one thing I don't like is how expensvie a celebration can become!  This is an amazing party that Nancy of A to Zebra Celebrations did on a budget

Celebrating 4th of July on a Budget


Table set-up:
• A cake, cupcakes or dessert does not need to be the focal point in the middle of the table. She used awhite beverage jar to make it the focal point.

She decided not to buy desserts such as cookies, cupcakes, or cake pops because it can get very expensive, but instead used fruit which is  was way more affordable.

4 clear star dishes from Dollar Tree ($4)
Red and white tootsie rolls ($3)

2 bags of "flag" mints from Dollar Tree ($2)

"Red vines" ($1) and wrapped them with flag ribbon purchased at Hobby Lobby for 90% off last year. It helps to buy things after each holiday when they go on clearance.
All the mason jars are from Goodwill.  $3.50 for all of them

The patriotic straws inside the jars are from the Dollar Tree ($1)

The little flags are from Target --3 of them for $1

The red jars next to the white beverage jar are from Hobby Lobby. Clearance aisle for $1.25 each

The roses in the mason jars are from the Dollar Tree

Wrapped 2 cans of soup with patriotic scrapbook paper to set the little red jars on top

She made her own pennant banners from scrapbook paper. If you don't want to make your own, you can purchase them at A To Zebra Celebrations.

Brilliant idea to use a cookie cutter to cut out the watermelon!


All the little tags, signs, and party circles are a FREE download from Paper & Pigtails. You can download them here: http://www.mediafire.com/file/5oq3itg8jbfkkcw/July4thPrintables.zip

What a beautiful party and NO one would ever guess this was done on a budget!

Total for this party was less than $80.
Photos done by Jamie Lynn Photography

A to Zebra Celebrations can be found here:
 
What are your 4th of July plans?

Saturday, June 25, 2011

. . . Super Saturday Special . . .

Do you ever have one of those weeks where you just lose track of time?  Well, that is the kind I had this week and all day yesterday I thought it was Thursday.  That meant about midnight it dawned on me that I had totally screwed up and missed Fun Friday Finds!  I guess we are having Fun Friday Saturday Finds or as I will call it today Super Saturday Special!

The 4th of July is coming quickly so I thought it would be fun to share some Red, White and Blue ideas with you.  I got in the spirit earlier this week when I showed you my 4th of July Wreath and No Sew Cushion Cover so I started gathering ideas for the special day. 


Fireworks Wreath @ Landee See, Landee Do
Burlap and Denim Wreath @ The Crafty Shoppe

4th of July Decor @ The Happy Scraps
Patriotic Ribbon Topiary Tree @ A Diamond in the Stuff
DIY Slat Flat @ Love Sweet Love
Bottlecap Flag @ Sweet Somthing Designs

Red, White & Blue Popcorn Balls @ Red Couch Recipes
Flag Pops @ Simply Designing
Sugar Cone Covers @ She's Kinda Crafty
Berry Cheesecake Pie @ Creations by Kara

Stay tuned tomorrow for an amazing 4th of July Party by A to Zebra Celebrations!

Wednesday, June 22, 2011

. . . Strawberry Egg Rolls . . .

I am a big fan of egg rolls--how can you go wrong with fried dough?  When I saw these Strawberry Egg Rolls over at Miss in the Kitchen I knew it was a glorious combo--fried dough and my favorite fruit (oh, and don't forget the cream cheese frosting).  These were so easy to make and were super duper yummy either plain or with ice cream and chocolate sauce.


Print Recipe HERE


You will not be disappointed with this delicious recipe!


Tuesday, June 21, 2011

. . . Cookie Time Tuesday-Flourless PB Chocolate Chip . . .

Today I am doing a super duper easy cookie that is fantastic but I swear it has special powers because I can't quit eating them.  The amazing thing is that there is no flour or butter in the cookie at all which is unique.  I think you will really enjoy these!  These originally came from Divine Baking--a fab blog! 

 Print Recipe HERE 
:::::::::::::::::::::::::::::::::::::::::::::::::::::::::::::::::::::::::::::::::::::::::::::::::::::::::::::::::::::::::::::::

 • Gather Ingredients
• Mix all ingredients except chocolate chips
• Dough will be crumbly

• Add chocolate chips and mix well
• Roll into balls and space about 2 inches apart
• Bake for 10 to 12 minutes at 350 degrees
• Cool completely and serve.

 Linking Here:

Monday, June 20, 2011

. . . DIY Cushion Cover and A Yarn Wreath . . .

I have a bench sitting on my front porch that my parents and sister gave us as a housewarming gift years ago.  It came from an Amish Woodworker and I love it because of the sentimental value.  I don't like it without a cushion and for the first few years of owning it I'd go out and buy new cushions but they are pricey and fade so quickly in the amount of sun we get on the front porch.  I finally got smart and started covering the cushion with a vinyl tablecloth!  It is not a bench we use alot so I never worry about the cover shifting or anything like that so I don't know if it would work on a bench you sit on daily.  It is so much fun to pick up seasonal tablecloths and cover the bench--and don't forget CHEAP!  Most of the time the tablecoths can be used again so I have a stack of them in my garage and just recover it with them when I want a change.

I also like to have my front door decorated with a wreath that matches the cushion cover of the moment so with July 4th right around the corner I decided to go with a Red, White & Blue theme.  Do you remember these Fuzzy Yarn Wreathes I made?  Well, I thought this was probably the perfect wreath to make again in red, white and blue yarn and add stars--luckily my grandmother had tons of red, white and blue yarn so it was a very inexpensive project.  I printed off stars in the size I wanted--2, 3 and 4 inches-and cut them out of cardstock to trace them onto my felt, cut them out then I pinned them to the wreath with pearl head pins.  Tada!  It's totally festive for the Independence Day Holiday.

 • • • • • • • • • • • • • • • • • • • •
The cushion is still wrapped in the bright tablecloth I used at the beginning of summer.
You will need a vinyl tablecloth and safety pins.

See how terribly faded this cushion cover became over time?  Well, I no longer worry about fading because it's so inexpensive to go snatch up a cute vinyl tablecloth.

Lay out your new tablecloth backside up.  Place cushion in center making sure the tablecloth is smoothed out.

Take one end and pull up over the cushion tightly.
 
Now you are basically just going to do a "gift" wrap technique and place your safety pins throughout so it doesn't come undone.  I typically use three pins on each end and then three across the cushion bottom.

Flip over the cushion to place on your bench.  Don't worry about the creases from the folds because they will go away very quickly. 

 • • • • • • • • • • • • • • • • • • • •

Yarn Wreath for July 4th
•  Cut all the yarn you want to use in long strips the same length.  I find cutting enough yarn to cover about half the wreath works great otherwise it's too much yarn and it gets tangled.  
• Pin your yarn to the wreath form and start wrapping continuously around the form.
• Trace out your stars or circles to create flowers.
• You might one more than one size star templates.  I used 2, 3 and 4 inches.

 • I layered 3 stars together in alternating color.
• Pin your stars to your wreath with a pearl head pin
• I put three stars on one side and two on the other
• Hang on your door


Linking up here: